Model Design Accelerator
Model Design Accelerator is an extension of Framework Manager which has been designed to simplify the design and creation of a single fact relational star schema model. Model Design Accelerator can be used to create a relational star schema model that adheres to proven modeling practice. By using Model Design Accelerator, a novice modeler can build a Framework Manager model without extensive training, and a more experienced modeler can quickly build a new model, thereby reducing the time taken to design and build a Framework Manager model.
This chapter covers the following topics:
- The Model Design Accelerator user interface
- Starting Model Design Accelerator
- Adding tables
- Adding joins
- Generating Framework Manager models
By the end of this chapter you will be able to use Model Design Accelerator to design a new Framework model.
To introduce Model Design Accelerator, we will use a fairly simple schema based on a rental star schema, derived from the MySQL Sakila sample database. This database can be downloaded fromhttp://dev.mysql.com/doc/sakila/en/. It is just one example of a number of possible dimensional models based on this sample database. The schema for this sample database can be found in Appendix, Data Warehouse Schema Map. To use this schema, you will need to create a data source connection to the database before starting.
Model Design Accelerator user interface
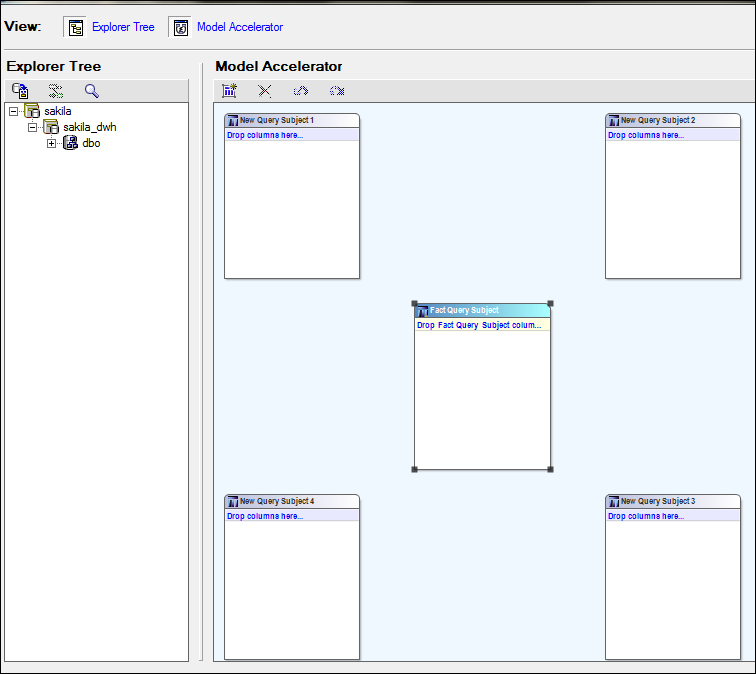
The user interface of Model Design Accelerator is very simple, consisting of only two panels:
- Explorer Tree: This contains details of the database tables and views from the data source.
- Model Accelerator: This contains a single fact table surrounded by four dimension tables, and is the main work area for the model being designed.
TIP
By clicking on the labels (Explorer Tree and Model Accelerator) at the top of the window, it is possible to hide either of these panels, but having both these panels always visible isbeneficial.
Starting Model Design Accelerator
Model Design Accelerator is started from the Framework Manager initial screen:

- Select Create a new project using Model Design Accelerator….
- This will start the new project creation wizard, which is exactly the same as if you were starting any new project.
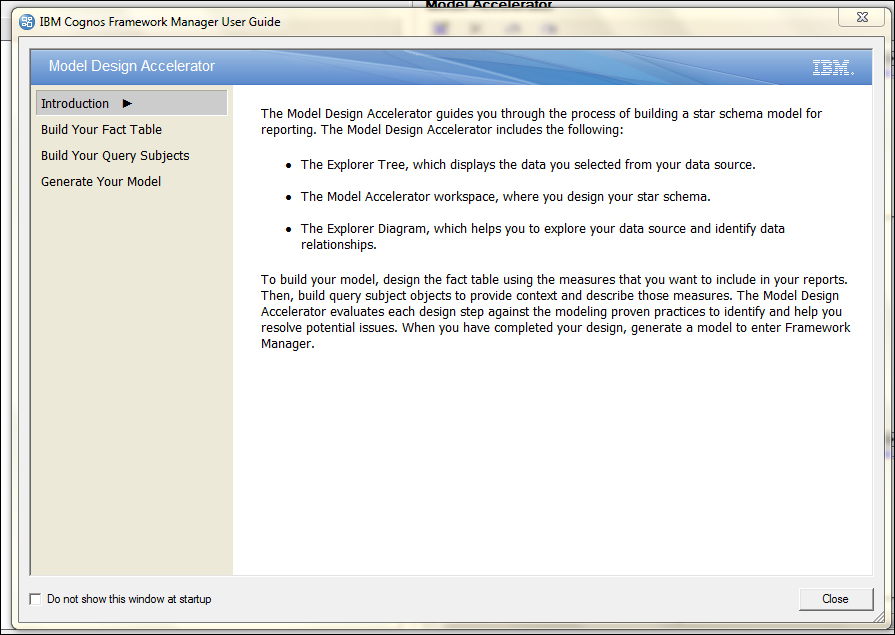
- Select the data source to import the database tables into the new model. After importing the database tables, the project creation wizard will display the Model Design Accelerator Introduction screen:
- After reading the instructions, click on the Close button to continue.
- This will then show the Model Design Accelerator workspace.
Adding tables to your workspace
The first step in creating your model with Model Design Accelerator is to add the dimension and fact tables to your model:
- From the Explorer panel, drag-and-drop dim_date, dim_film, dim_customer, anddim_store to the four New Query Subject boxes in the Model Accelerator panel.
- After adding your queries, right-click on the boxes to rename the queries to Rental Date Dim,Film Dim, Customer Dim, and Store Dim respectively.
TIP
- If not all query columns are required, it is also possible to expand the dimension tables and drag-and-drop individual columns to the query boxes.
- In the Explorer Tree panel, expand the fact_rental table by clicking on the (+) sign besides the name, and from the expanded tree drag-and-drop count_returns, count_rentals, andrental_duration columns to the Fact Query Subject box.
- Rename the Fact Query Subject to Rental Fact.
- Additional dimension queries can be added to the model by clicking on the top-left icon in theModel Accelerator panel, and then by dragging and dropping the required query onto the workplace window.
- Since we have a start_date and an end_date for the rental period, add a second copy of thedate_dim table, by clicking on the icon and dragging the table from the Explorer view into the workspace. Also rename this query as Return Date Dim:

Adding joins to your workspace
After we have added our database table columns to the workspace, we now need to add the relationship joins between the dimension and fact tables. To do this:
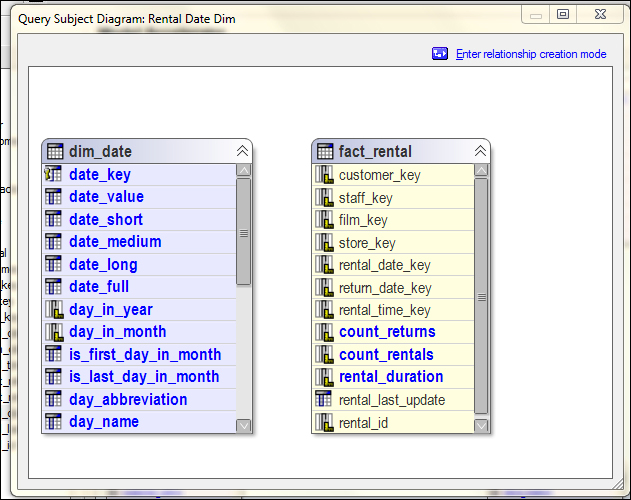
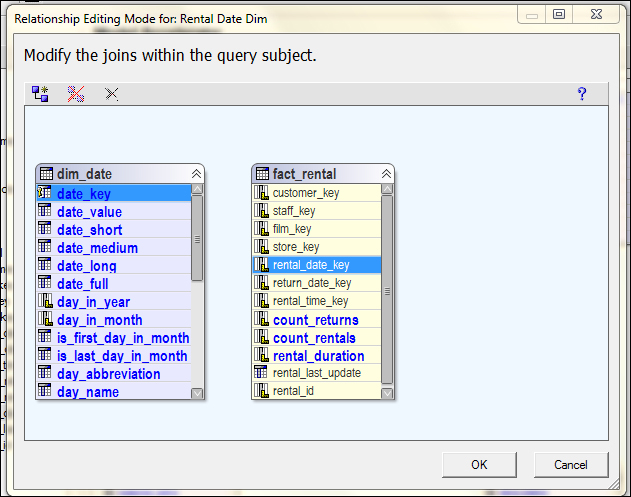
- Double-click on the Rental Date Dim table, and this will expand the date_dim and thefact_rental tables in the workspace window:
- Click on the Enter relationship creation mode link.
- Select the date_key column in the dim_date table, and the rental_date_key column in thefact_rental table as follows:
- Click on the Create relationship icon:
- Click on OK to create this join.
- Close the Query Subject Diagram by clicking on the (X) symbol in the top-right corner.
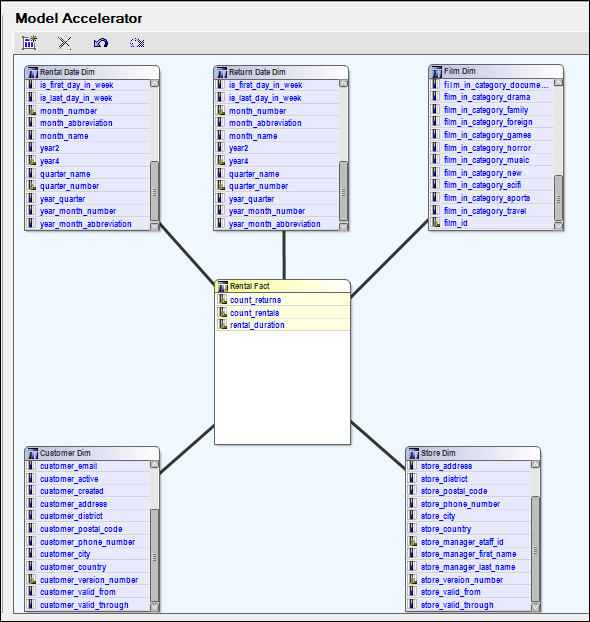
- Repeat this procedure for each of the other four tables; the details of the joins to use can be found in Appendix, Data Warehouse Schema Map.

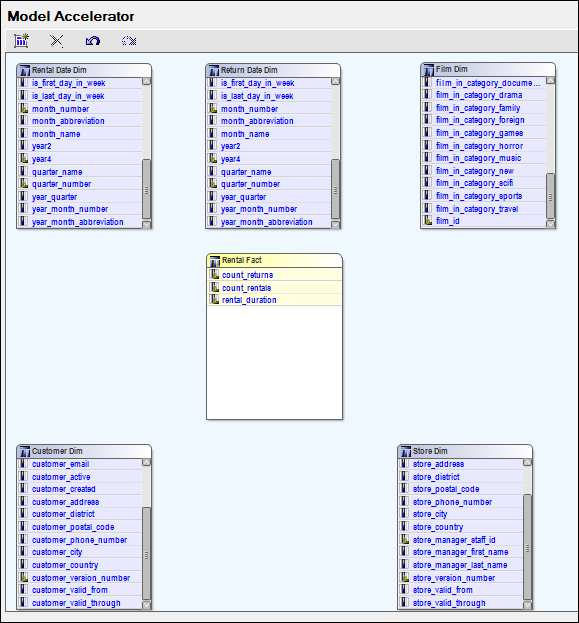
The final model will look like the following screenshot:
Generating a Framework Manager model
Once we have completed our model in Model Design Accelerator, we need to create a Framework Manager model:
- Click on the Generate Model button.
- Click on Yes to generate your model.
- The Framework Manager model will be generated and will open as follows:
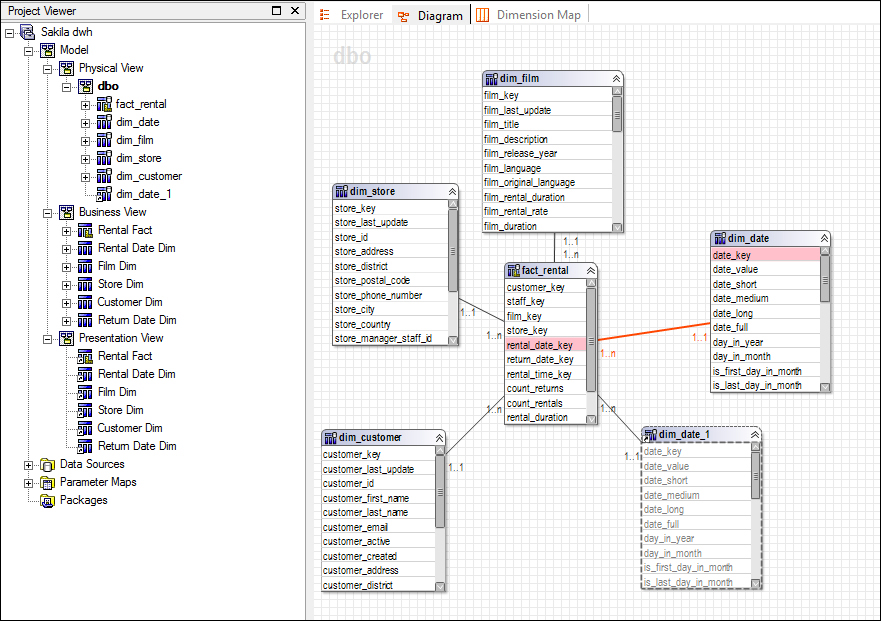
When you generate your model, all of the Model Advisor tests are automatically applied to the resulting model. You should review any issues that have been identified in the Verify Results tab, and decide whether you need to fix them.
When you generate the model only those query items required will be used to create the Framework Manager model. The Physical View tab will contain only those tables required by your star schema model. The Business View tab will contain model query subjects containing only the columns used in your star schema model. The Presentation View tab will only contain shortcuts to the query subjects that exist in the Business View tab.
After generating your model, you can use Framework Manager to improve the model by adding calculations, filters, dimensions, measures, and so on.
Each time you generate a Framework Manager model from your Model Design Accelerator model, a new namespace is created in the current Framework Manager model and any improvements you want to use will also need to be applied to these new namespaces.
From Framework Manager you can return to Model Design Accelerator at any time to continue making changes to your star schema.
To return to the Model Design Accelerator from within Framework Manager:
- From the Tools menu, select Run Model Design Accelerator.
- You may choose to continue with the same model or create a new model.
To make your star schema model available to the report authors, you must first create a package and then publish the package to your Cognos Reporting Server.
Very nice post.keep sharing more posts.
ReplyDeletecognos training
cognos bi training